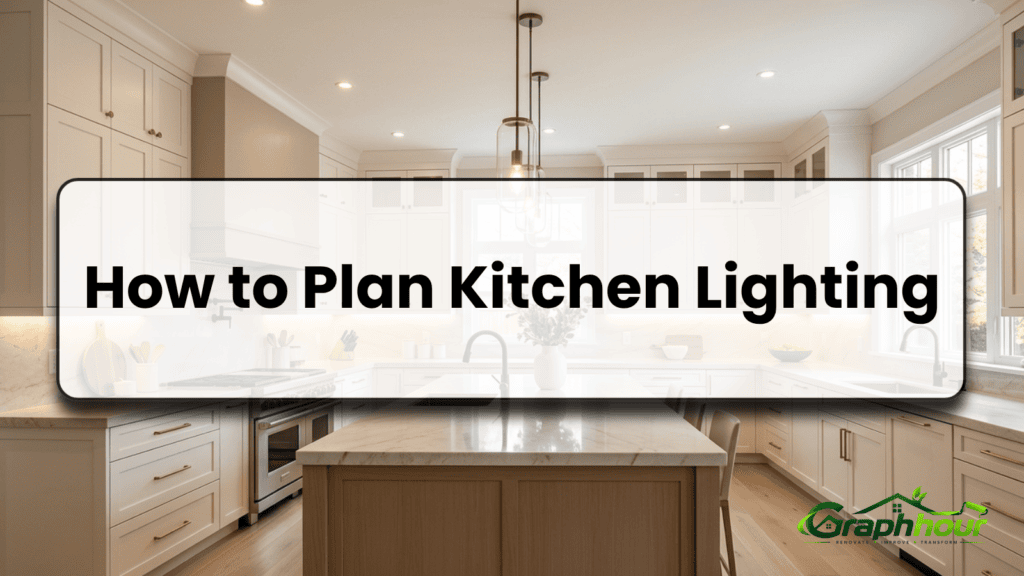
Planning kitchen lighting is about much more than choosing a beautiful pendant light or installing a few bright bulbs in the ceiling. A modern kitchen needs to perform several jobs at once. It is a place where you prepare food, cook, clean, eat, work, entertain guests, and sometimes simply sit down with a cup of coffee. That means one single overhead light is rarely enough to make the room feel comfortable and functional. The best kitchen lighting ideas use layers, zones, and controls so you can create the right amount of light for every activity.
Current kitchen design guidance continues to emphasize a layered approach that combines ambient lighting, task lighting, and accent or decorative lighting. Recent professional guides also highlight the importance of independently controlling different lighting zones instead of putting every fixture on one switch. This approach helps prevent harsh, overly bright spaces while ensuring countertops and other work areas receive enough focused illumination.
Whether you are building a new kitchen, remodeling an old one, or simply improving a poorly lit space, the secret is to plan the lighting before you buy fixtures. Think of your lighting plan as a recipe. Your ambient lighting is the base, task lighting is the essential ingredient that makes the kitchen work, and pendant lighting or accent lights add the finishing touch. When these elements work together, your kitchen becomes easier to use, more attractive, and much more flexible throughout the day.
Why a Kitchen Lighting Plan Matters
A proper kitchen lighting plan helps you avoid one of the most common design mistakes: treating the entire room as one lighting zone. Imagine trying to cook dinner under a single ceiling light positioned behind you. Your body creates a shadow directly across the countertop, which means the place where you need the clearest visibility becomes the darkest part of the room. You might have plenty of light in the middle of the kitchen but still struggle to see while chopping vegetables, reading a recipe, or cleaning near the sink. That is why planning lighting around activities rather than simply around the ceiling creates a much better result.
Kitchen lighting also has a powerful effect on how the room looks and feels. Harsh overhead lighting can make even an expensive kitchen feel cold and clinical, while a carefully layered scheme can add depth to cabinetry, countertops, backsplashes, and architectural features. Recent design guidance continues to recommend avoiding reliance on decorative lighting alone and combining it with practical layers that support safe food preparation and everyday tasks.
The planning stage is also the best time to think about wiring, switches, fixture locations, and dimming. Moving electrical points after cabinets, ceilings, and finishes have been installed can become expensive and frustrating. Planning early gives you more freedom to create separate zones for overhead lights, under cabinet lighting, island pendants, dining fixtures, and accent lights.
The Problems Caused by Poor Kitchen Lighting
Poor lighting can create shadows, glare, dark corners, and uneven brightness. A common mistake is placing recessed lights in a neat grid without considering where the cabinets and work surfaces will actually be installed. The result may look symmetrical when the room is empty, but once wall cabinets are fitted, some lights may illuminate cabinet doors instead of countertops. Professional kitchen lighting guides recommend planning fixture positions around the final kitchen layout and work zones rather than treating lighting as a separate afterthought.
Another problem is using only one color temperature or one extremely bright setting for every situation. A kitchen needs different moods at different times. Bright light may be useful while preparing dinner, but the same intensity can feel uncomfortable when the kitchen is being used for a quiet evening meal. A good plan gives you control rather than forcing one lighting condition on the entire room.
Start With How You Actually Use Your Kitchen
Before selecting fixtures, ask yourself a simple question: What happens in this kitchen every day? Do you cook frequently from scratch? Does your family eat at the island? Do children do homework at the counter? Is the kitchen part of an open-plan living area? The answers will determine where your strongest task lighting and most flexible controls should be located.
For example, someone who mainly uses the kitchen for quick meals may need a simpler system than someone who spends hours cooking and baking. A large island used for food preparation requires stronger functional lighting than a decorative island used mainly for serving drinks. By identifying the actual activities in each zone, you can prevent the common mistake of spending most of your budget on attractive fixtures while neglecting the places where good light is genuinely needed.
Understand the Three Main Layers of Kitchen Lighting
The easiest way to understand a kitchen lighting plan is to divide it into three main layers: ambient lighting, task lighting, and accent or decorative lighting. The National Kitchen & Bath Association’s current educational resources continue to teach layered lighting as a way to balance function, mood, intensity, color temperature, and visual appeal.
Each layer has a different job. They should complement one another instead of competing for attention. When you understand this principle, choosing fixtures becomes much easier because you can evaluate every light by asking, “What job is this fixture supposed to perform?”
Ambient Lighting
Ambient lighting provides the overall illumination of the kitchen. It creates a comfortable base level of light that allows you to move around the room safely and see the general space clearly. Recessed lights, ceiling fixtures, flush-mount fixtures, and carefully selected central lights can all provide ambient illumination. The goal is not necessarily to make every square inch equally bright but to create an even and comfortable foundation.
A good ambient layer should also work with natural daylight. During the day, sunlight may provide most of the general illumination near windows, while deeper areas of the kitchen still need electric light. At night, the ambient layer becomes more important, particularly in larger or open-plan kitchens. Recent kitchen planning guidance recommends starting with the ambient layer and then building task and accent lighting around it.
Task Lighting
Task lighting is the workhorse of your kitchen. It provides focused illumination where you prepare food, cook, wash dishes, or perform other detailed activities. The main task-lighting locations usually include countertops, kitchen islands, sinks, cooktops, and pantry work areas. Unlike general ceiling lighting, task lighting needs to be positioned carefully so your own body does not block the light.
This is where under cabinet lighting becomes particularly valuable. Upper cabinets naturally cast shadows over countertops, and an overhead light may not completely solve that problem. By placing LED lighting underneath wall cabinets, the light source moves closer to the work surface and reduces shadows. Current guidance also emphasizes mounting under-cabinet lights toward the front portion of the cabinet so more light reaches the countertop rather than simply washing the backsplash.
Accent and Decorative Lighting
Accent lighting adds depth, personality, and visual interest. It can highlight glass-front cabinets, open shelves, architectural details, or decorative backsplashes. Decorative fixtures, including pendant lighting, can also become a focal point while still contributing useful illumination.
The important thing is not to expect accent lighting to replace task lighting. A beautiful pendant may look spectacular above an island, but if it creates glare or leaves the prep surface dark, the lighting plan is incomplete. The strongest designs combine beauty with purpose, allowing decorative fixtures to enhance the room without sacrificing usability.
Step 1: Assess Natural Light and the Kitchen Layout
Start your plan with the room itself. Look at where sunlight enters during the morning, afternoon, and evening. A large south- or west-facing window may make part of the kitchen extremely bright during certain hours, while a galley kitchen with limited windows may depend heavily on artificial lighting. Natural light should influence your plan, but it should not be treated as a replacement for a well-designed electric lighting system.
Next, mark the locations of your cabinets, countertops, sink, cooktop, refrigerator, island, dining table, doors, and walkways. This creates a practical map of where lighting is actually needed. A fixture location that looks correct on an empty floor plan may become useless once tall cabinets or wall units are installed. Current kitchen layout guidance specifically warns against planning lighting as a simple ceiling grid without considering the cabinetry and work surfaces below.
Map Windows, Doors, Cabinets, and Work Zones
Divide your kitchen into functional zones. Your main prep zone might need the strongest combination of task and ambient light, while a dining nook may benefit from a warmer and dimmable fixture. The area around the refrigerator and pantry may need good general visibility, while glass cabinets may only require subtle accent lighting.
This process makes your lighting plan much more intentional. Instead of asking, “How many lights should I install?” ask, “What does each area need?” That small change in thinking can completely transform the final design.
Step 2: Plan Your Ambient Lighting
Once your layout is clear, plan the ambient layer. Recessed lighting is a popular option because it can provide broad illumination without visually cluttering the ceiling. However, more recessed lights do not automatically mean better lighting. Too many fixtures can create glare, excessive brightness, and a ceiling that feels crowded.
Your fixture layout should follow the room’s functional zones. Consider where cabinet faces end, where countertops begin, and where people stand while working. If you are using recessed fixtures above work areas, their placement should be coordinated with the cabinetry so the light falls where it is useful. Professional guidance also recommends separating lighting zones so that all ceiling lights do not have to operate together.
Choosing Between Recessed, Flush-Mount, and Ceiling Fixtures
Recessed lights work well in modern kitchens because they provide a clean appearance and broad illumination. Flush-mount or semi-flush fixtures can be useful in kitchens with lower ceilings. A statement ceiling fixture may work beautifully in a dining section or a smaller kitchen, especially when supported by additional task lighting.
The best choice depends on ceiling height, room size, style, and the amount of light required. Avoid choosing a fixture solely because it looks attractive in a showroom. Always consider its beam direction, brightness, glare potential, and relationship to the other lighting layers.
Step 3: Add Task Lighting Where You Need It
After establishing the ambient layer, focus on the places where you work. Countertops should be one of your highest priorities because they are used for chopping, mixing, measuring, reading recipes, and preparing meals. Task lighting should make these activities easier without producing harsh glare or distracting shadows.
Under-cabinet LEDs are often one of the most effective solutions for countertop illumination because they place the light directly above the work surface. Recent guidance describes them as particularly effective at addressing shadows created by upper cabinets and by the person standing at the counter.
Lighting Kitchen Countertops and Prep Areas
For most kitchens, run task lighting across the main countertop areas where food preparation happens. Continuous linear LED lighting generally creates a more even result than widely spaced individual lights because it reduces bright and dark patches. If you choose puck lights, carefully plan their spacing to prevent scalloped pools of light across the countertop.
The key is to test the light’s direction. You want illumination on the cutting board, not a bright reflection bouncing into your eyes from a glossy backsplash or countertop. A professional lighting plan considers both brightness and visual comfort.
Sink and Cooktop Lighting
The sink and cooktop deserve dedicated attention because these areas involve detailed tasks. A range hood may include built-in lighting for the cooktop, while the sink may benefit from a ceiling fixture, pendant, or carefully positioned recessed light. Make sure the fixture placement does not create a shadow from your head or upper body while you are working.
These areas should also be planned with electrical and safety requirements in mind. If you are installing new wiring or fixtures near water, steam, or cooking equipment, work with a qualified electrician and follow applicable local electrical codes.
Step 4: Plan Under Cabinet Lighting
Under cabinet lighting is one of the most practical upgrades you can include in a kitchen. It improves countertop visibility, adds depth to the room, and can create a soft evening atmosphere when the main lights are turned off. LED strips, linear fixtures, and puck lights are common options, each with different advantages.
For a continuous modern look, linear LED strips installed in an appropriate channel can provide even illumination across long cabinet runs. Puck lights can create focused pools of light but may require more careful spacing. Recent product and design guidance also emphasizes considering installation method, brightness, dimming compatibility, transformers or drivers, and whether the lighting is primarily intended for task or accent use.
LED Strips, Puck Lights, and Linear Fixtures
LED strips are flexible and work particularly well for long cabinet runs. Linear fixtures can offer a more finished appearance and may distribute light more evenly. Puck lights are useful when you want focused illumination, but they can create uneven brightness if they are spaced too far apart.
For most active prep areas, prioritize even coverage over dramatic effects. The goal is to make the entire working surface useful. You should also choose fixtures that are easy to clean because kitchens naturally accumulate grease and dust over time.
Best Placement for Under Cabinet Lighting
Placement can make or break under-cabinet lighting. Mounting a light too far toward the wall can illuminate the backsplash beautifully while leaving the front edge of the countertop relatively dark. Recent professional guidance recommends positioning the lighting toward the front portion of the cabinet to direct more useful light onto the work surface.
If possible, put under-cabinet lights on their own switch or dimmer. This gives you the flexibility to use them alone for late-night snacks, early mornings, or relaxed entertaining without turning on the entire kitchen.
Step 5: Choose Pendant Lighting for Islands and Dining Areas
Pendant lighting can be one of the most visually striking elements in a kitchen. A pair or group of pendants above an island can define the center of the room and create a strong focal point. In an open-plan layout, pendants can also help visually separate the kitchen from surrounding living or dining spaces.
Size and proportion matter. Pendants that are too small can disappear in a large kitchen, while oversized fixtures may block sightlines and make the island feel crowded. Current kitchen lighting guidance commonly recommends using pendants as part of a broader layered scheme rather than relying on them as the only source of illumination.
Pendant Size, Spacing, and Height
The number of pendants should depend on the length of the island and the size of each fixture. A long island may suit two or three pendants, while a smaller island may look better with one larger statement fixture. Keep the arrangement visually balanced while ensuring the fixtures do not obstruct conversation or views across the kitchen.
Pendant height should also be adjusted for the people using the room, the ceiling height, and the fixture design. A fixture hung too low can become an obstacle, while one hung too high may lose its visual impact. Before final installation, temporarily test the height whenever possible.
Step 6: Choose Brightness, Color Temperature, and CRI
Brightness is measured in lumens, but planning a kitchen is not simply about achieving the highest possible number. Different areas need different amounts and qualities of light. Task areas generally require brighter, more focused illumination than pathways or decorative zones. Lighting education from the NKBA emphasizes understanding concepts such as lumens, intensity, color temperature, rendering, and placement when designing functional spaces.
Color temperature affects whether light appears warm or cool. Many homeowners prefer warmer tones for comfortable evening ambience, while neutral to somewhat cooler light may improve contrast in active work areas. The most important consideration is consistency. If one part of your kitchen appears warm yellow and another appears sharply blue-white, the room can feel visually disconnected.
CRI, or Color Rendering Index, is also important because it affects how accurately colors appear under artificial light. Higher-quality color rendering can make food, countertops, cabinetry, and finishes look more natural. This matters particularly in a kitchen, where you regularly judge the appearance of ingredients.
Step 7: Use Separate Circuits and Dimmers
One of the smartest parts of a modern kitchen lighting plan is giving each major layer independent control. Instead of turning every fixture on at once, you can control ambient lights, under cabinet lighting, pendants, and accent lights separately. This allows the kitchen to adapt throughout the day.
For example, you might use all lighting layers while cooking, then switch to dimmed pendants and under-cabinet lights while eating or entertaining. Recent kitchen lighting guidance specifically recommends separate circuits and zones to improve flexibility and prevent one lighting setting from being forced on every activity.
Dimmers are especially valuable because a kitchen can need dramatically different light levels at different times. They also help you soften a space that might otherwise feel overly bright at night. When selecting dimmers, always confirm compatibility with your chosen LED fixtures and drivers.
Common Kitchen Lighting Mistakes to Avoid
The first major mistake is relying on a single central ceiling light. Even if it produces a large amount of light, it cannot effectively perform every lighting job in the room. The second mistake is installing recessed lights before the final kitchen layout has been confirmed. Cabinet placement, work zones, and appliance locations should guide the lighting plan.
Another common problem is using decorative pendants as a substitute for functional task lighting. Pendants can be beautiful, but they may not eliminate shadows across every prep surface. Finally, avoid putting every fixture on one switch. A layered kitchen becomes much more useful when each lighting zone can be controlled independently. Current design guidance consistently supports layered, task-focused lighting rather than a one-size-fits-all approach.
Conclusion
A successful kitchen lighting plan starts with the way you live, cook, clean, and spend time in the space. Begin by mapping the kitchen layout and identifying natural light, cabinets, countertops, islands, sinks, cooktops, and dining areas. Then build your design in layers: ambient lighting for overall visibility, task lighting for work surfaces, and accent or pendant lighting for personality and atmosphere.
The most practical upgrade for many kitchens is well-planned under cabinet lighting, especially in areas where upper cabinets create shadows over the countertop. Combine that with carefully positioned ceiling lighting and independently controlled pendants, and you create a kitchen that works just as well for preparing a busy family meal as it does for a quiet evening.
The biggest lesson is simple: do not buy lights one fixture at a time without a complete plan. Design the lighting system as a whole. When every light has a purpose, your kitchen feels brighter when you need it, warmer when you want it, and more beautiful every time you walk into the room.
FAQs
1. What is the best lighting layout for a kitchen?
The best kitchen lighting layout uses multiple layers rather than relying on one fixture. Start with ambient ceiling lighting, add task lighting to countertops, sinks, and cooking areas, and use decorative or accent lighting to create depth. The exact layout should follow your cabinet positions and the activities performed in each part of the kitchen.
2. Is under cabinet lighting necessary in a kitchen?
While it is not mandatory, under cabinet lighting is one of the most useful additions to a kitchen because it directly illuminates countertops where upper cabinets often create shadows. It can improve visibility for food preparation and also provide soft ambience when the main lights are switched off.
3. How many pendant lights should I put over a kitchen island?
The answer depends on the island’s length and the size of the pendants. Smaller or medium-sized islands may work well with one or two pendants, while longer islands can accommodate two or three fixtures. Focus on visual balance, adequate task illumination, and keeping sightlines clear.
4. What color temperature is best for kitchen lighting?
A warm-to-neutral white range is popular for residential kitchens because it balances comfort with visibility. You may choose a warmer tone for ambient and decorative lighting while using a slightly brighter neutral light for detailed task areas. Keeping the lighting visually consistent across the room is usually more important than chasing one universal number.
5. Should kitchen lights be on separate switches?
Yes, separate controls are highly recommended. Ideally, ambient lights, task lighting, under cabinet lighting, and pendant or accent fixtures should have independent control where practical. Dimmers add even more flexibility by allowing you to adjust the mood and brightness for cooking, dining, cleaning, and entertaining.